Appearance
Supabase storage
Storage is a Supabase feature that lets you manage and store files in your application, similar to a file system in the cloud. It allows you to upload, organize, and serve files like images, documents, and videos, with built-in security controls to manage who can access them.
If you have installed the Supabase data source plugin, you can allow users of your WeWeb app to upload files to Supabase with the Storage | Upload a file action in workflows.
In the first two sections of this article, we will go through a couple of Supabase pre-requisites. If you're confident things are setup correctly in your Supabase project, skip ahead to the third section.
Supabase bucket
A bucket is a container for files within Supabase Storage, similar to a folder on your computer. Each bucket can be configured as public (accessible to everyone) or private (restricted access), and can have its own set of permissions and policies controlling who can upload, download, or modify files within it.
Before attempting to setup file upload in your WeWeb app, make sure everything is setup correctly in your Supabase project.
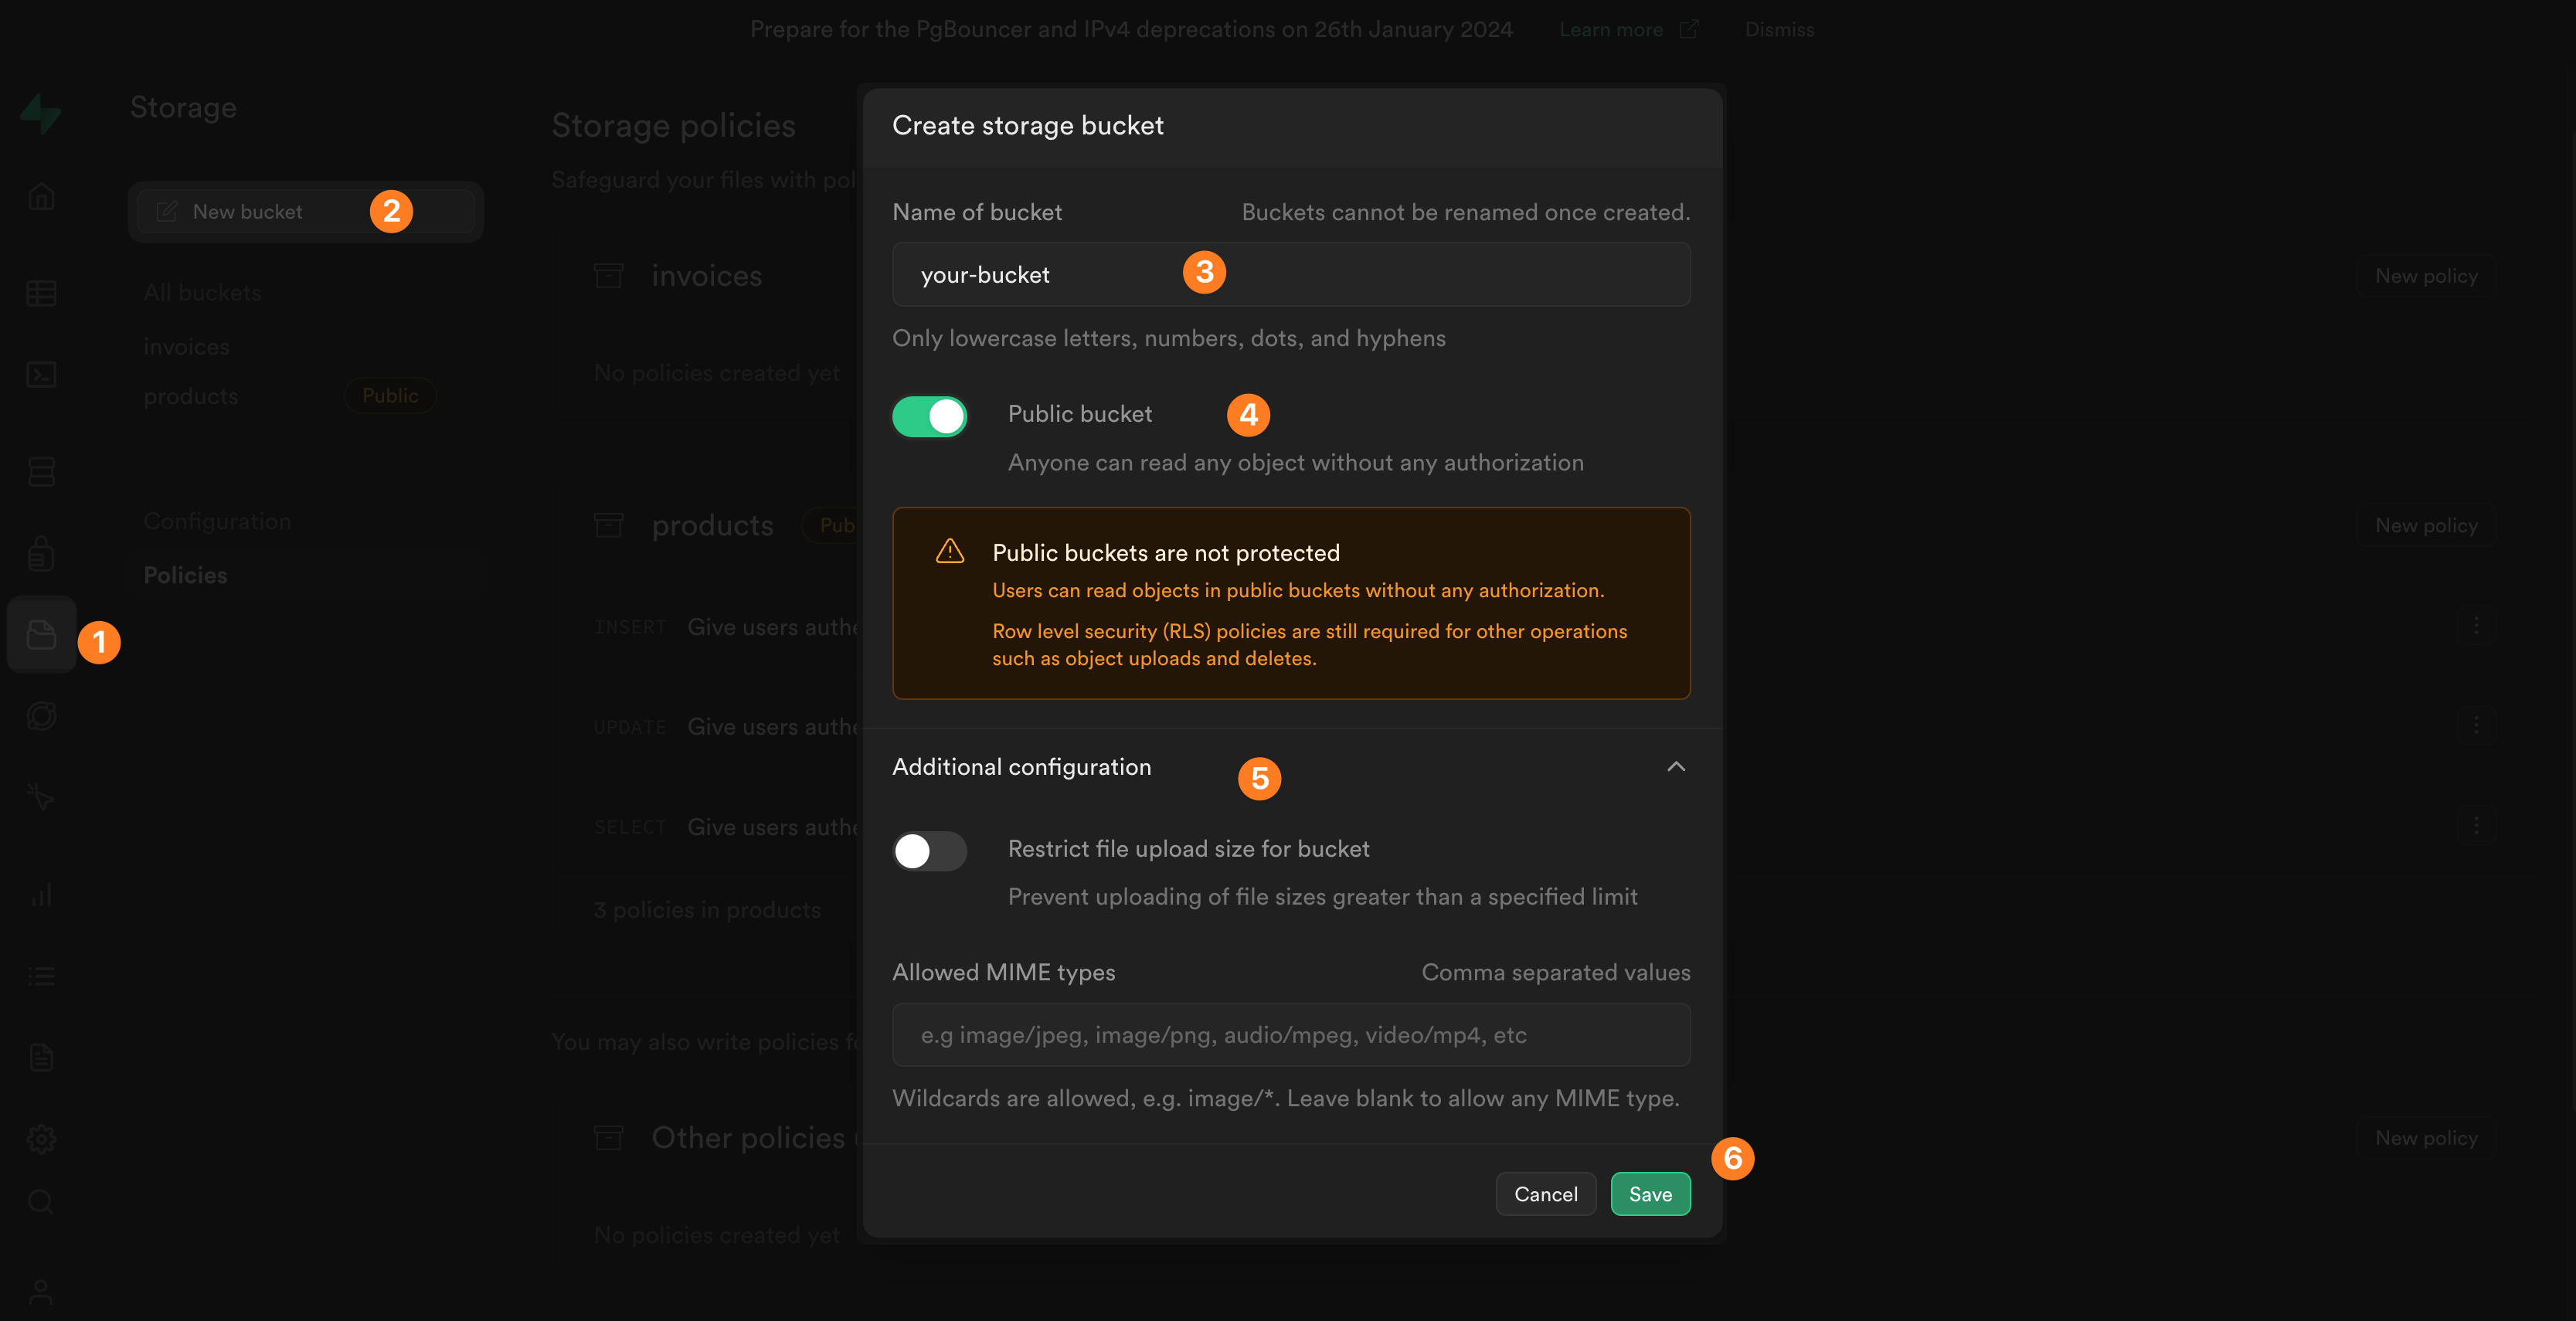
In the example above, we:
- Go to the
Storagesection of Supabase - Create a new storage bucket
- Name it
your-bucket - Decide that everyone can see the files added to this bucket
- Decide that there will be no restrictions on file size or format
- Save our new bucket
Private or public?
Create a public bucket if you want everyone to be able to view the files that are stored in that bucket. For example, product images that are meant to be seen and shared easily.
Create a private bucket if you want to be able to restrict who sees the files in a bucket. For example, purchase orders or invoices that are meant to be seen by authorized personel.
Supabase policies
If you want users of your WeWeb app to upload files to a Supabase bucket, you will need to create a Supabase policy to that effect:
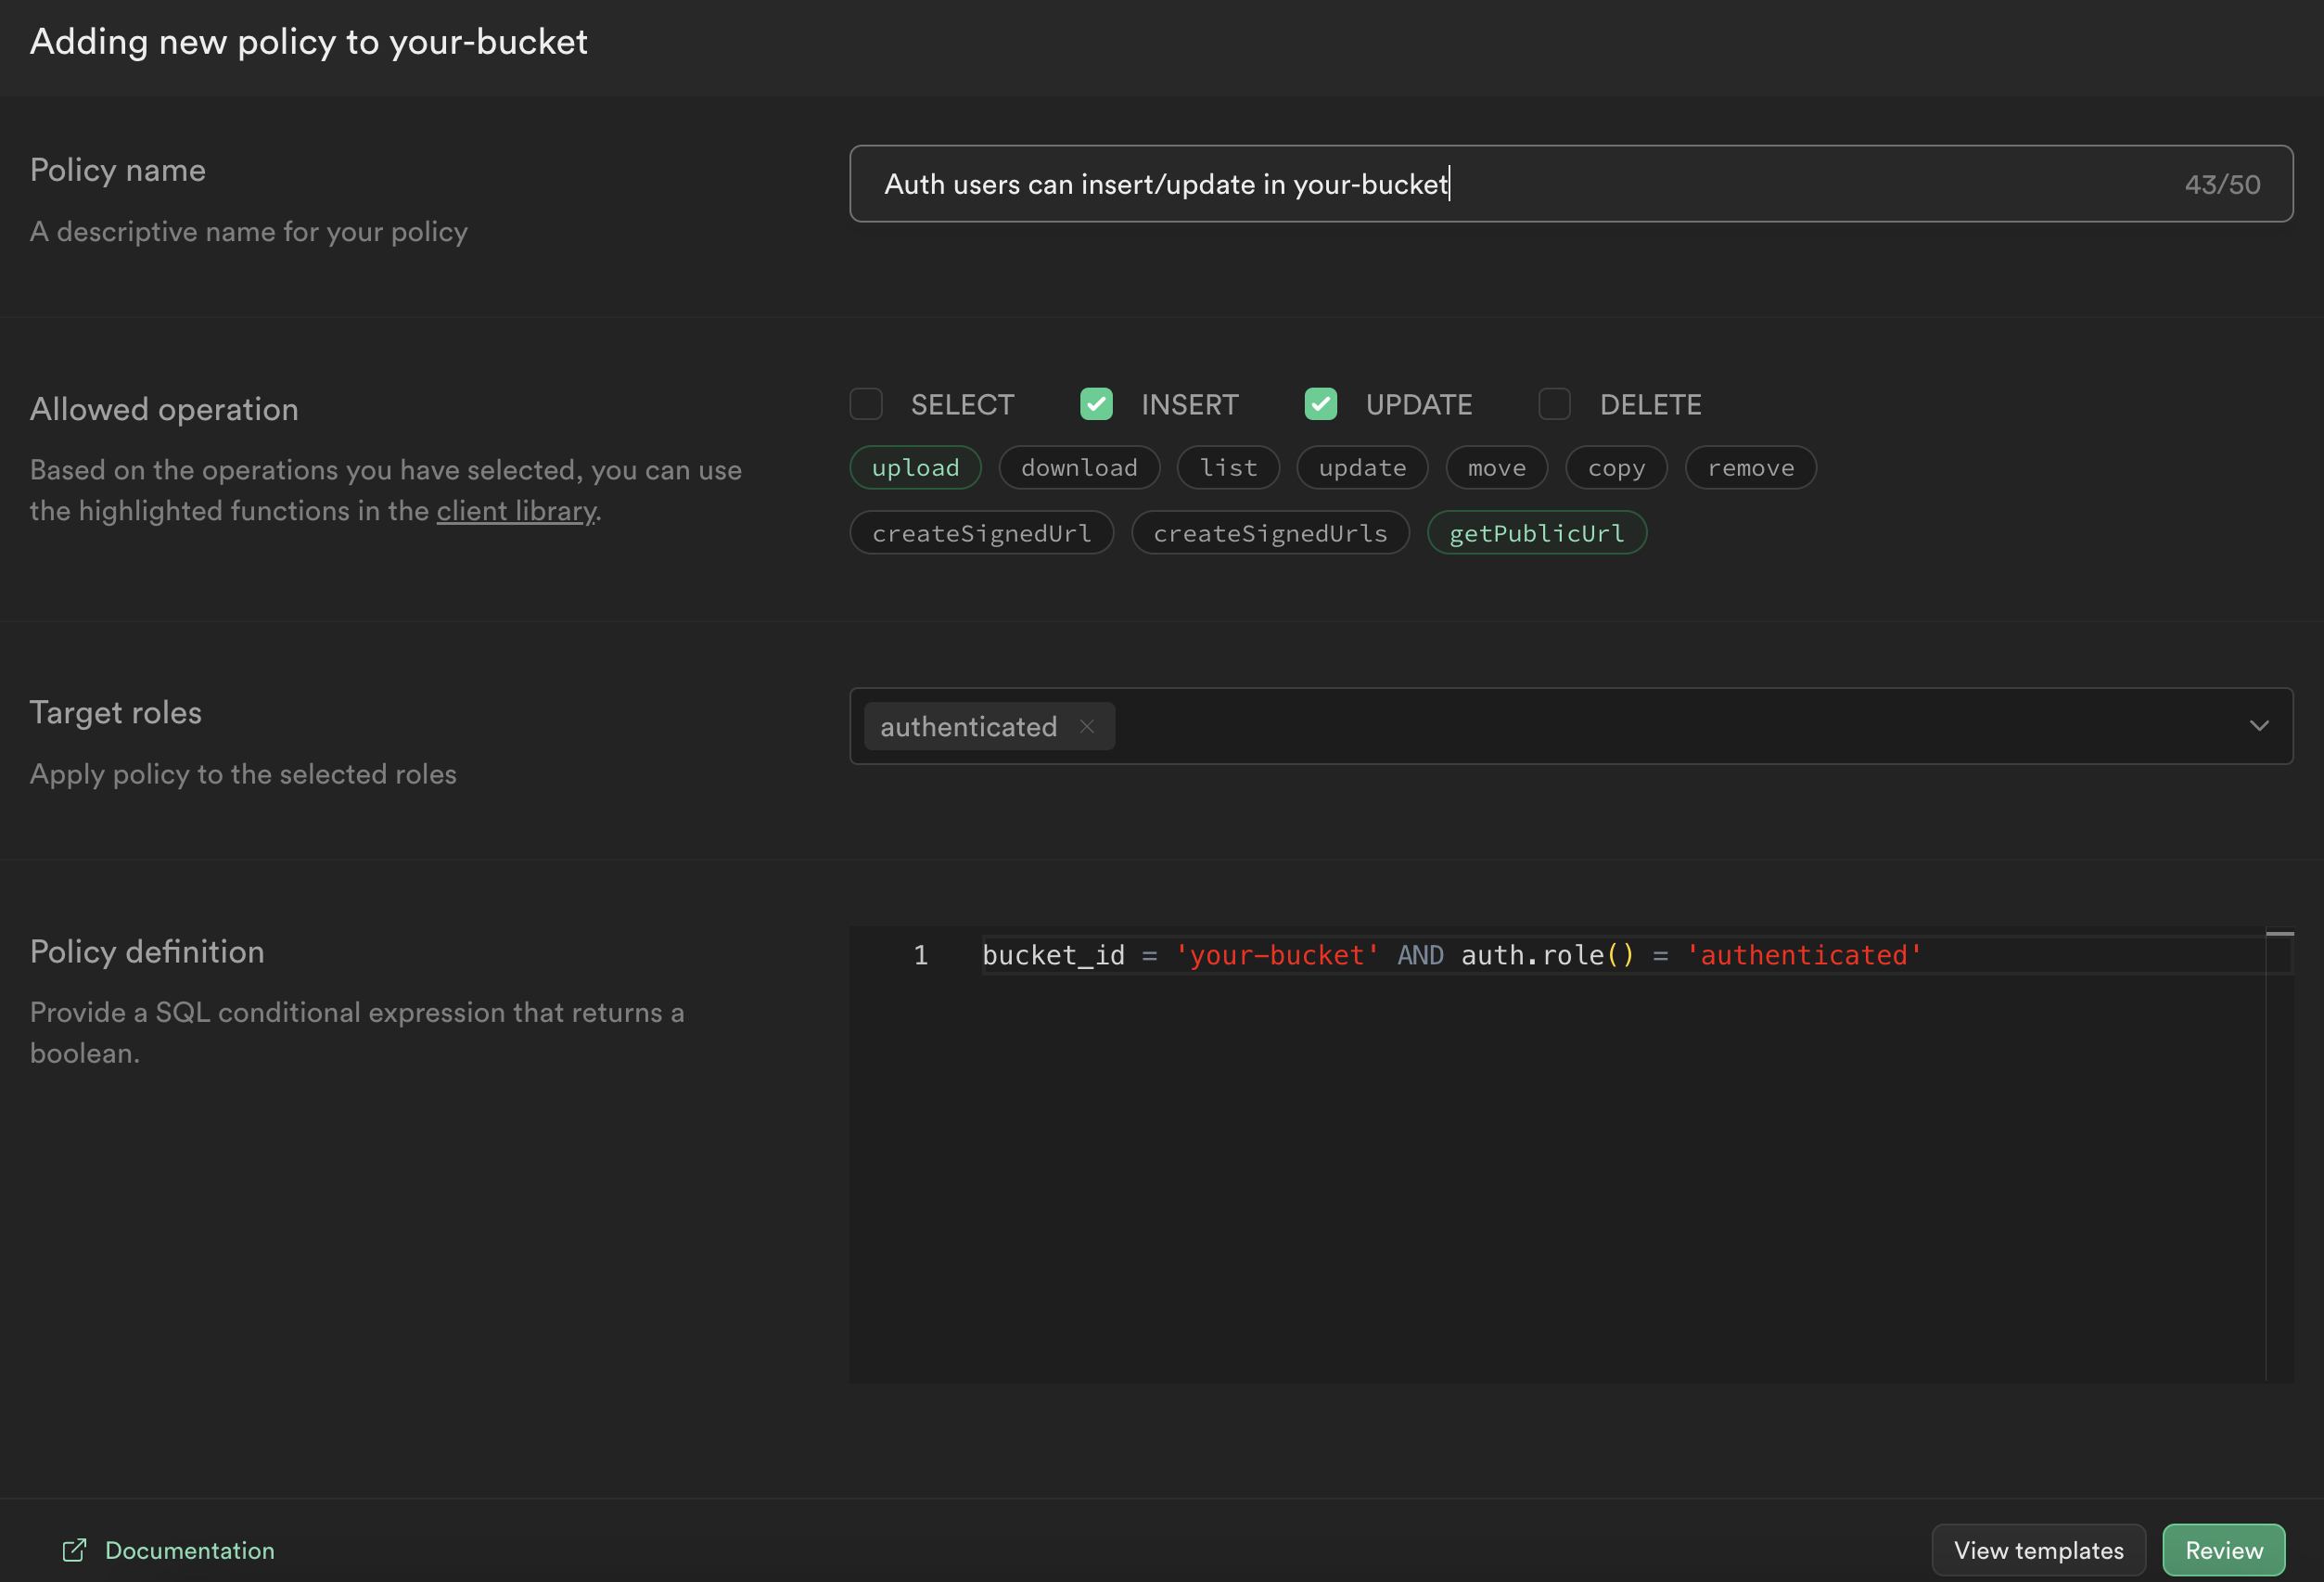
In the example above, we are saying that users need to be authenticated to INSERT or UPDATE a record in the your-bucket bucket.
TIP
This is just one approach possible. You need to decide what conditions a user needs to meet to have the right to insert or update files in a bucket and right policies accordingly.
Learn more about Supabase policies.
WARNING
Public buckets allow everyone to read (i.e. SELECT) data from the bucket. You will still need to do create INSERT, UPDATE, and DELETE policies if you want users to be able to add, update, or delete files in a public bucket.
Now for the upload workflows in WeWeb.
Upload elements
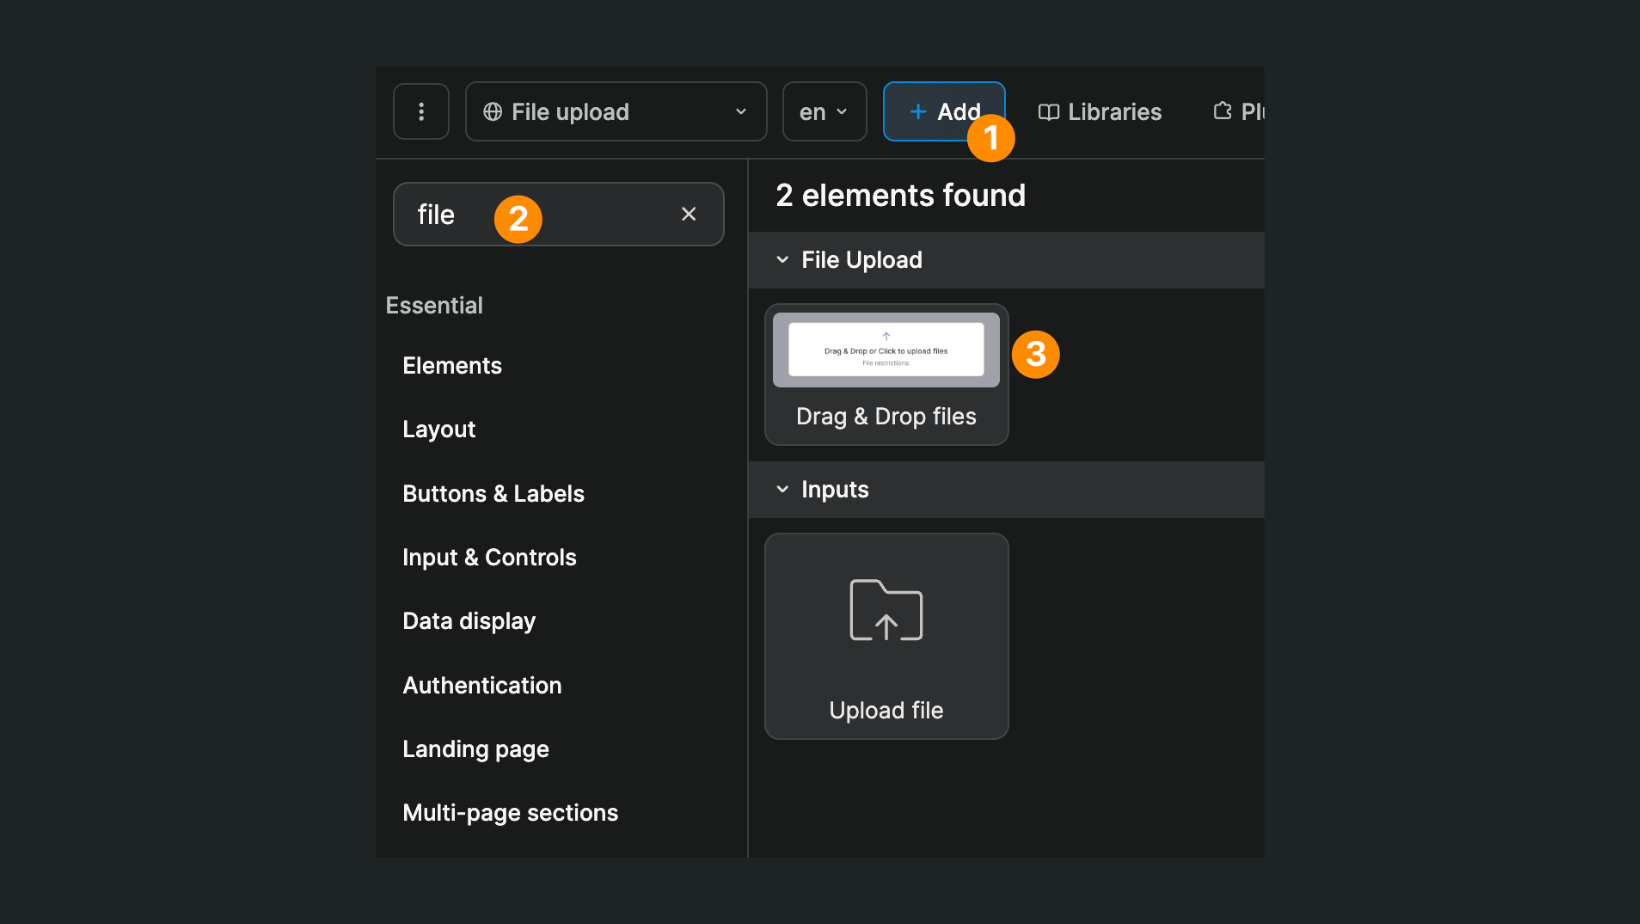
To enable file uploads in your WeWeb app, you can work with the Upload file element or the Drag & Drop files element:
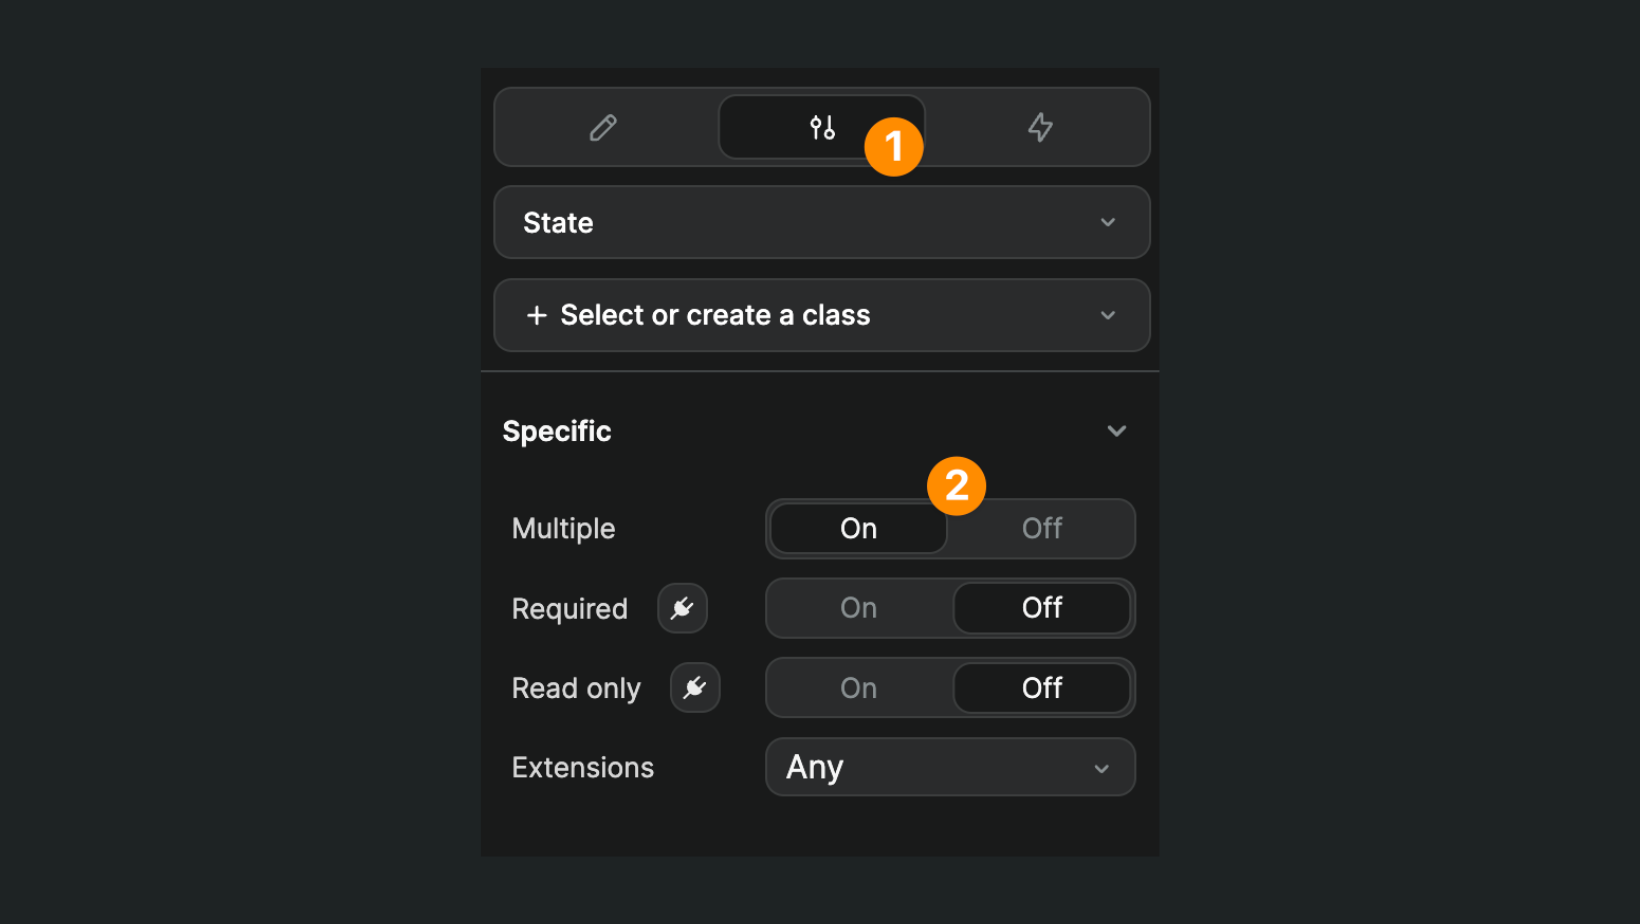
In the element settings, you can decide if users should be allowed to upload one or more files:
TIP
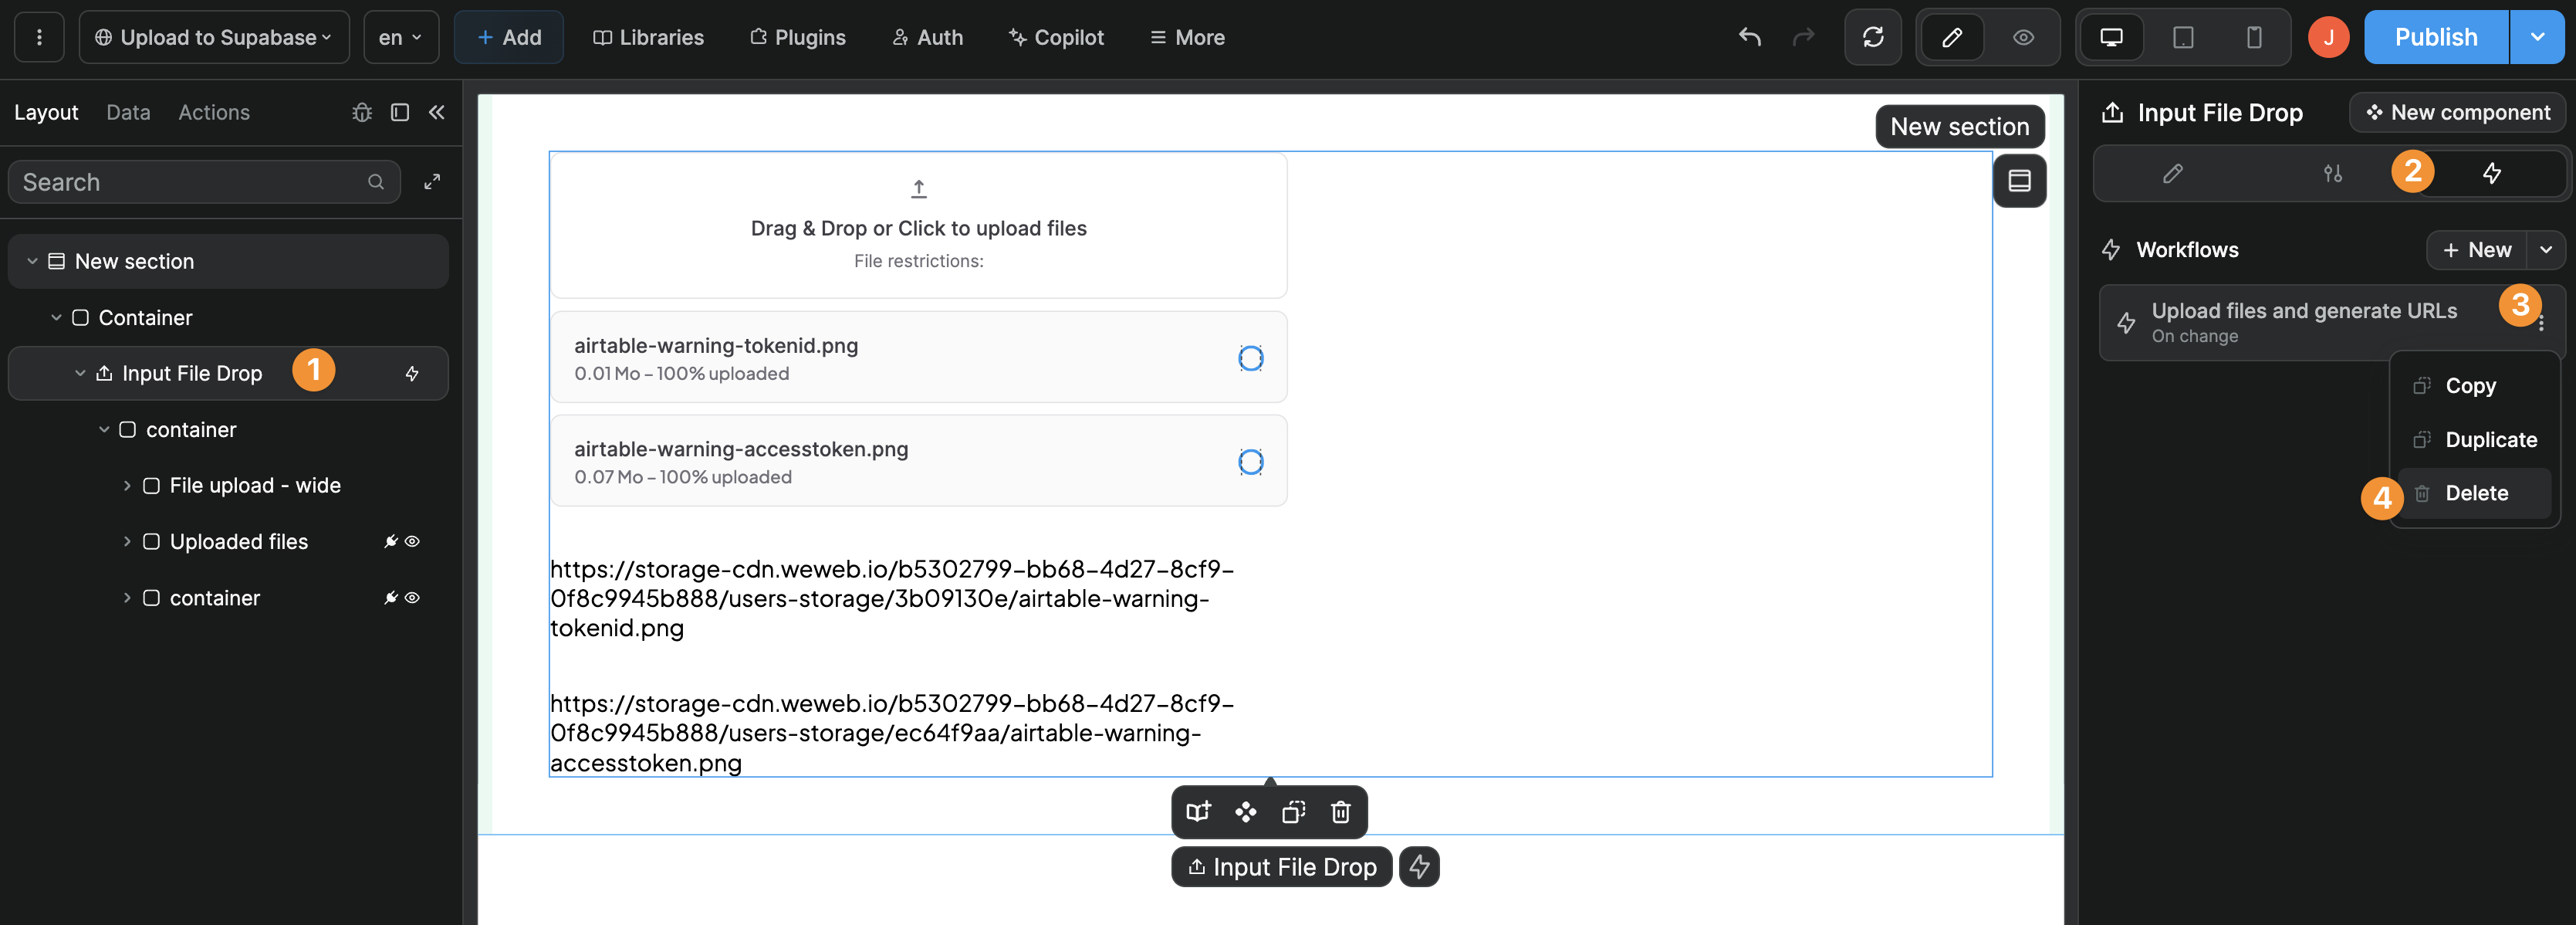
Upload elements may come with a pre-built workflow that uploads files to WeWeb's CDN and allows you to send file URLs to the backend of your choice.
Since you want to upload files directly to Supabase, feel free to remove pre-built workflows to start from scratch:
Test data
Before creating the upload to Supabase workflow, we recommend going to preview mode and uploading one or more files so that you have test data to work with when binding data in your workflow:
Single file upload
On the file upload element, create a workflow that triggers the Storage | Upload a file action On change:
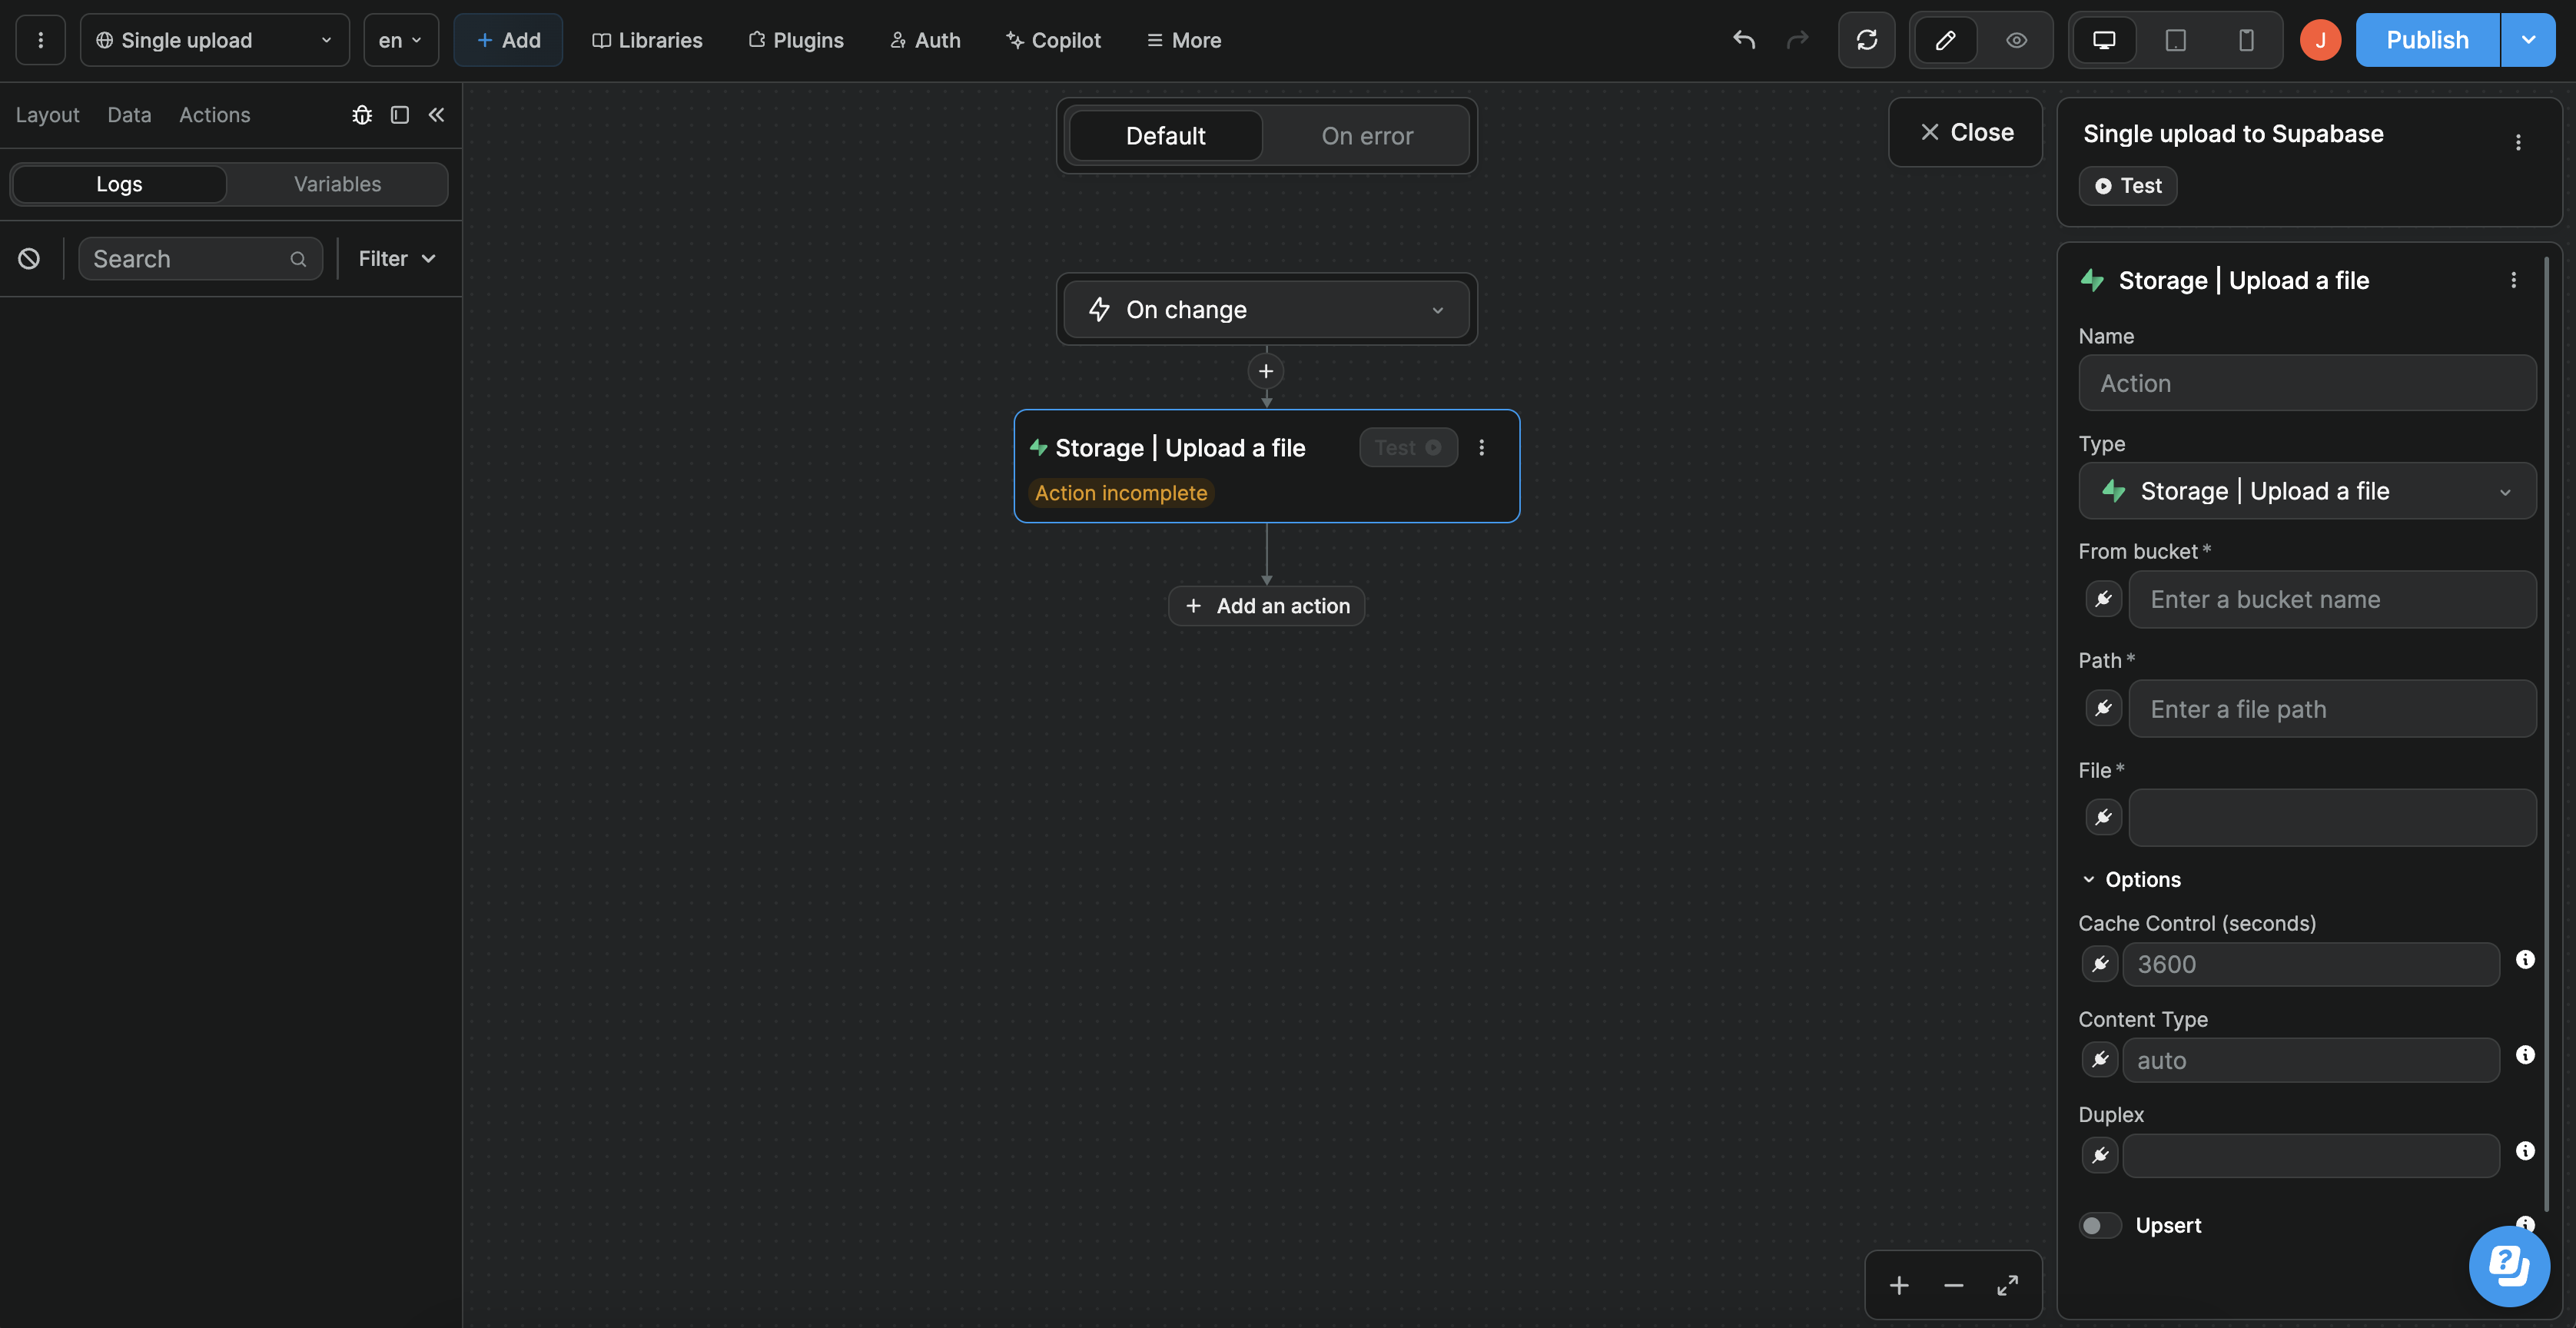
You will be invited to define what bucket the file should be sent to, the name of the file, and the file object itself.
From bucket
This is where you will input the name of the Supabase bucket where the file should be stored. In our case, we called it your-bucket.
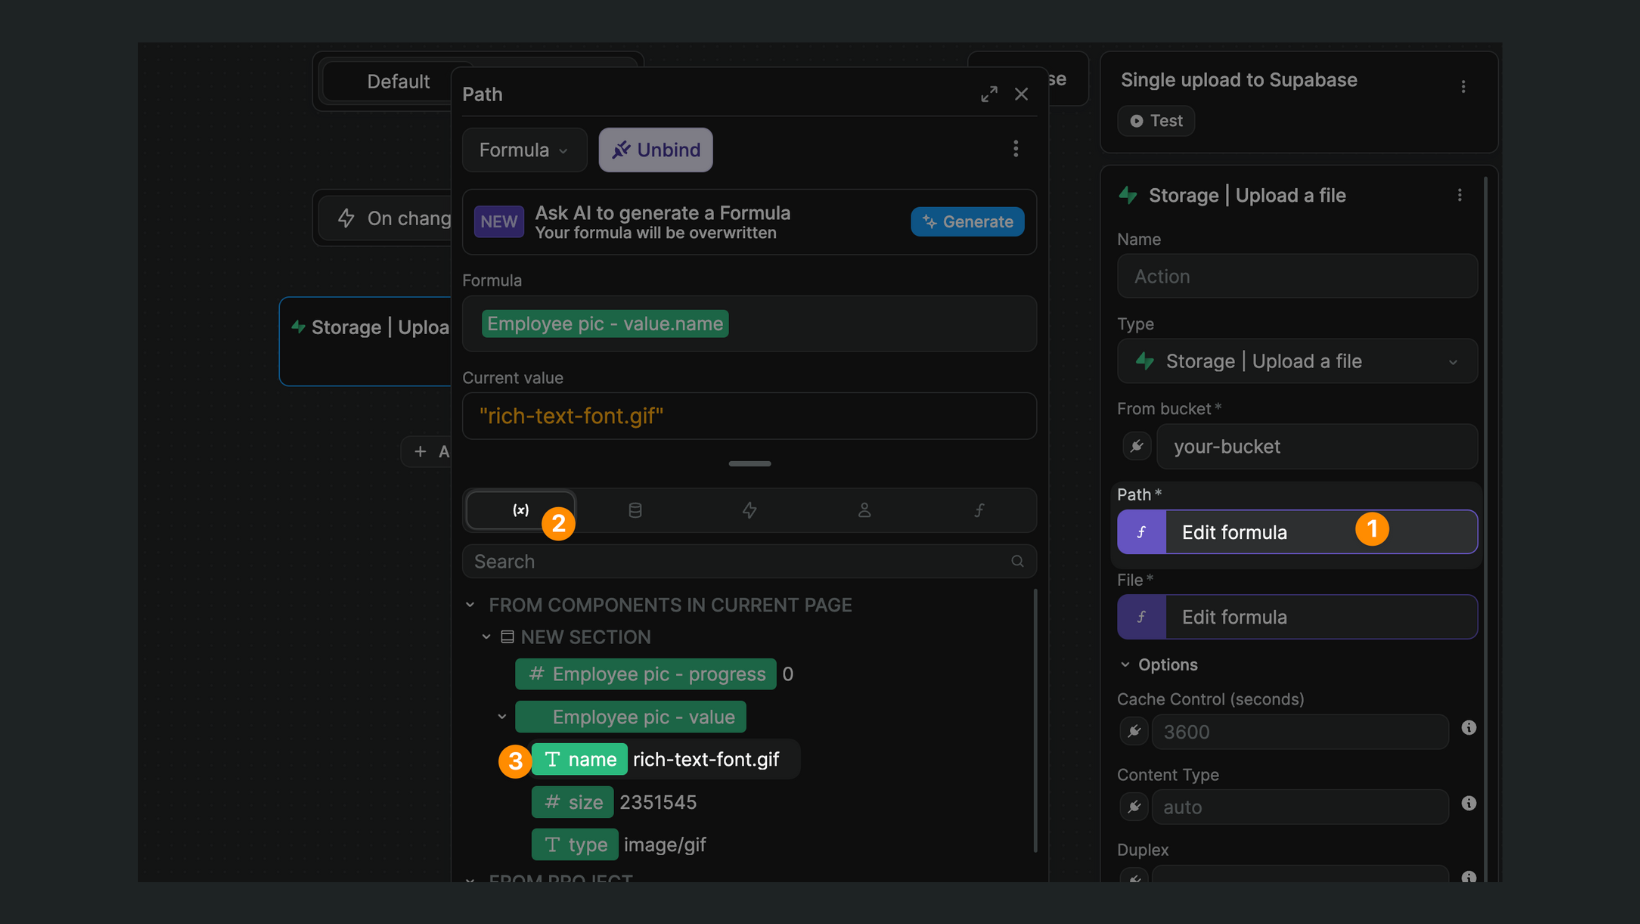
Path
This is the name of the uploaded file with its extension:
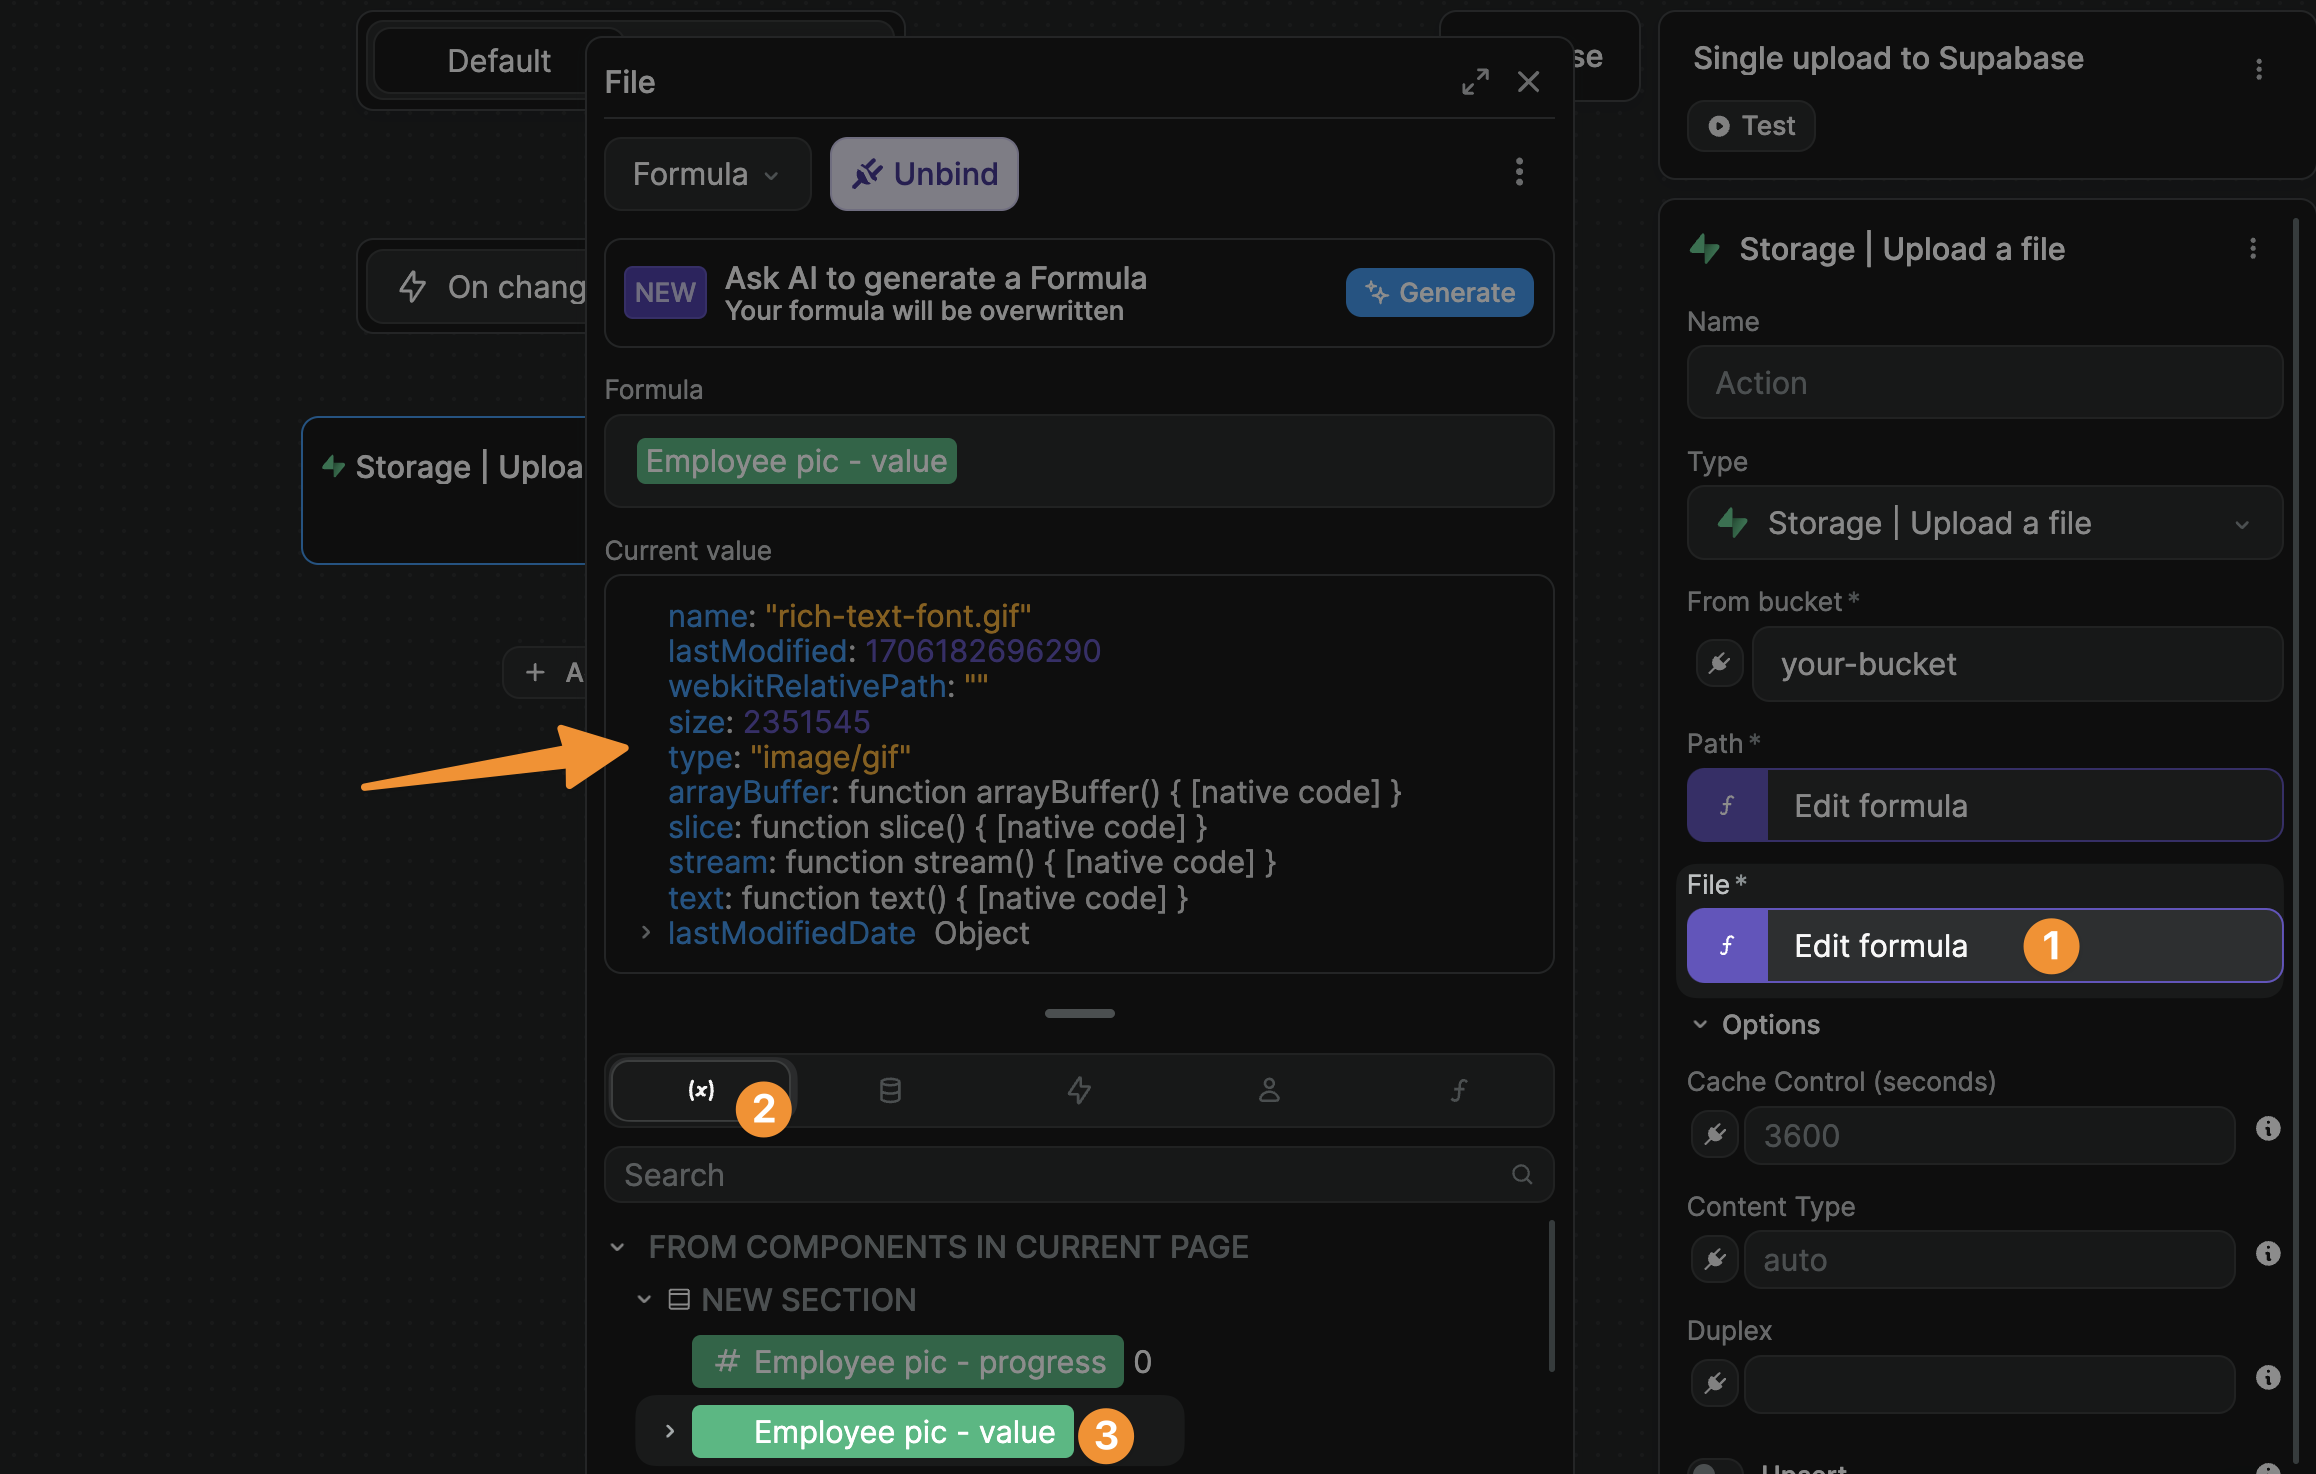
File
This is the file object itself (notice how the Current value is an object with a lot of information about the file that was uploaded):
That's it! If you test your workflow and go back to your Supabase bucket, you should see the file in storage.
If you run into errors, make sure to go back to our section on Supabase RLS policies above.
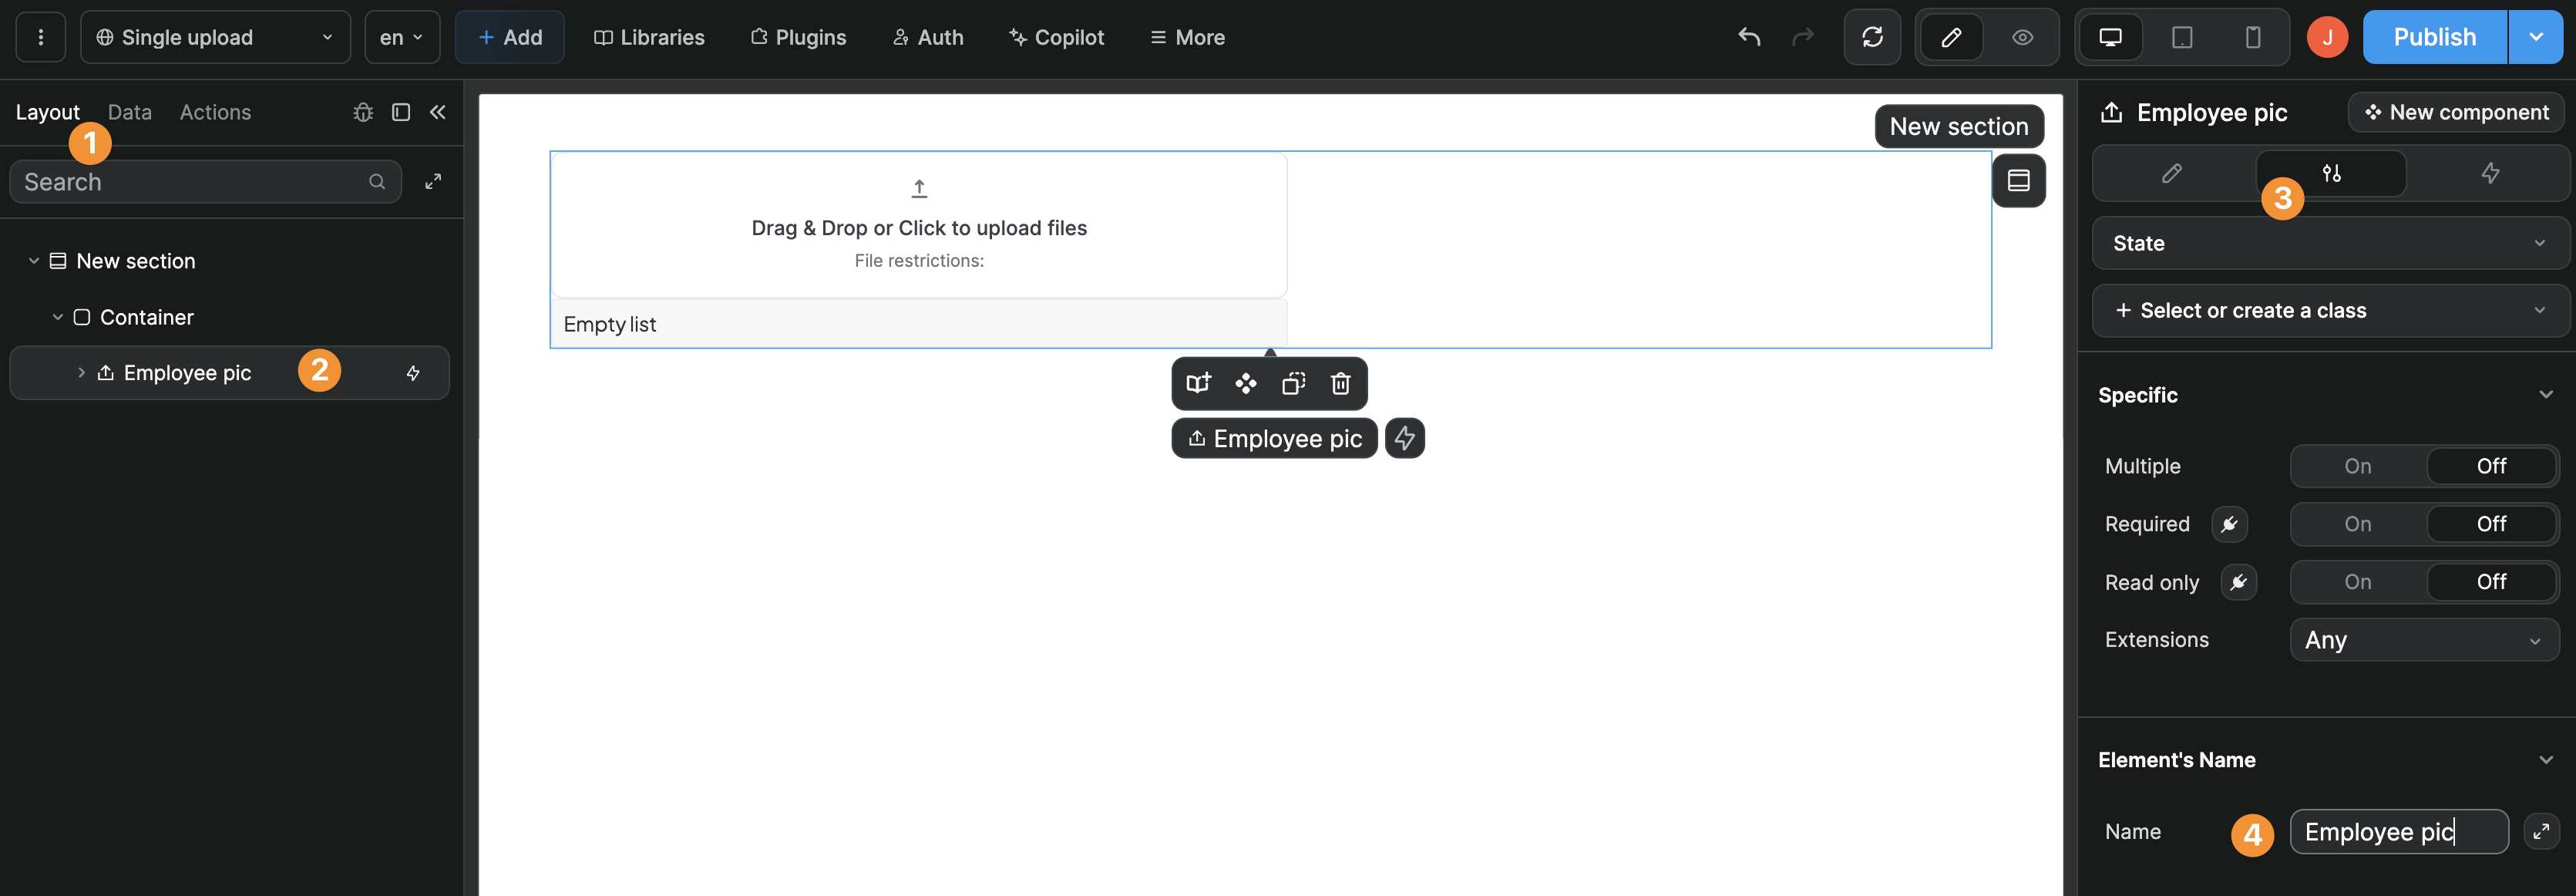
TIP
When dealing with multiple inputs on the same page, renaming the file upload element in your layout can help you bind data more easily.
Multiple file upload
To allow multiple file uploads, ensure you have selected Multiple in the upload element settings:
Loop through files
Then, on the file upload element, create a workflow On change that loops through the value component variable:
TIP
By default, when you're using the Drag & Drop files element, it will be called Input File Drop - multiple - value like in our example above but, if you are using a different element or renamed the element in the layout, it will have a different name.
For example here, the fact that we renamed the element Uploaded pictures in our layout is reflected in the name of the component variable:
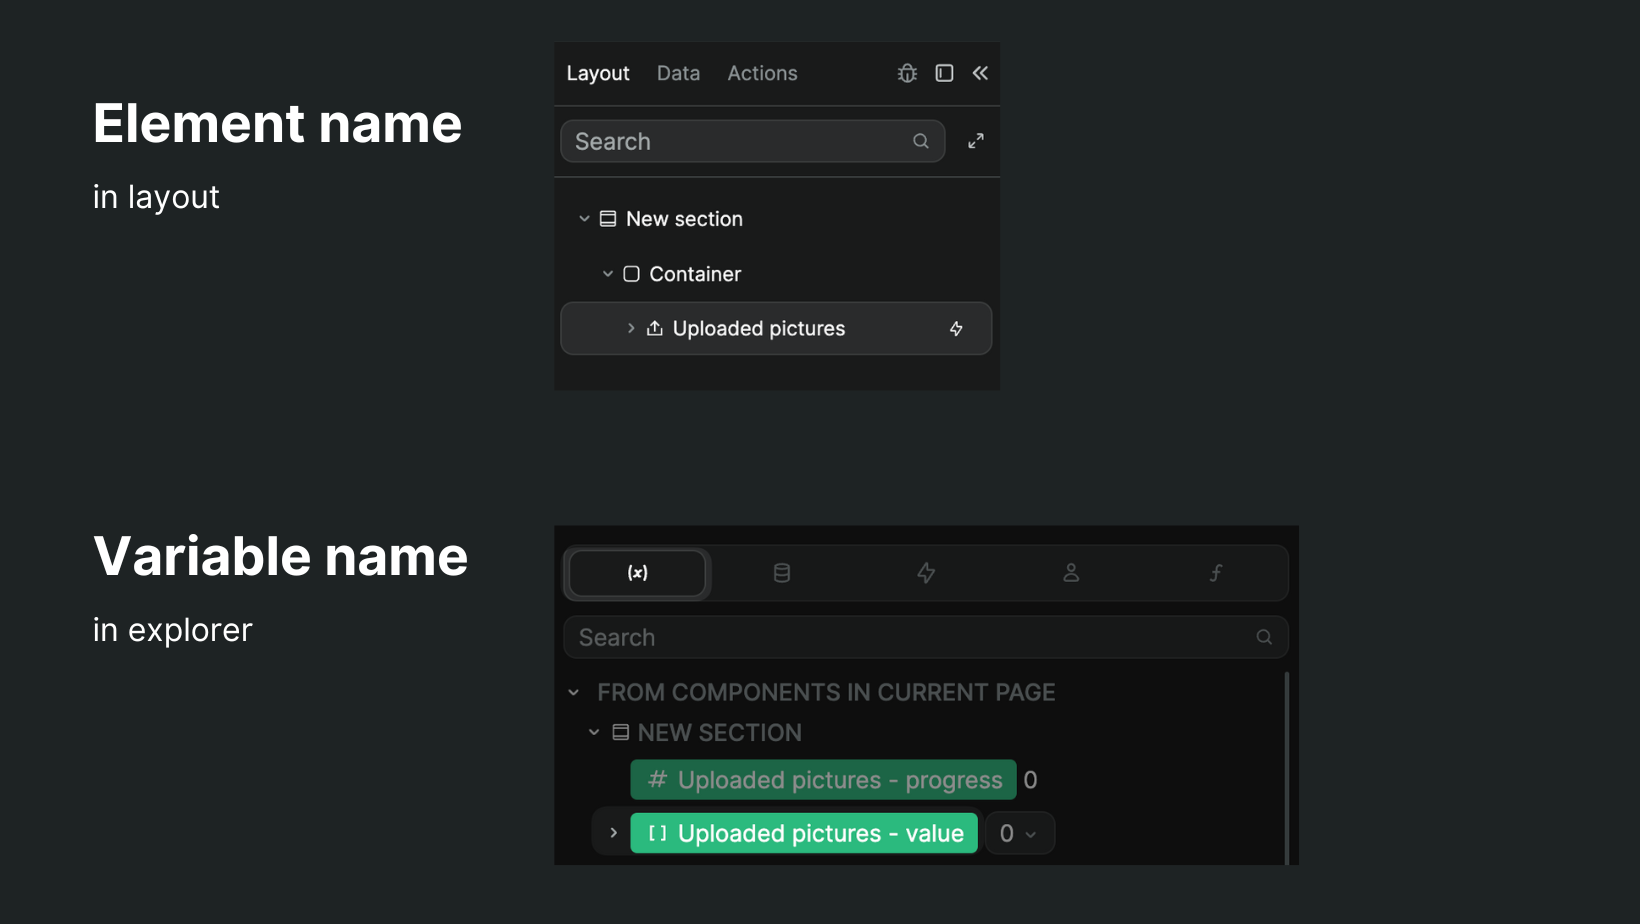
What's important is that you select the component variable that refers to the value of the files uploaded. In the case of the multiple file upload, that variable should be an array.
Test workflow
Before adding the Supabase Storage | Upload a file action, we recommend uploading a couple of files in preview mode and testing your workflow:
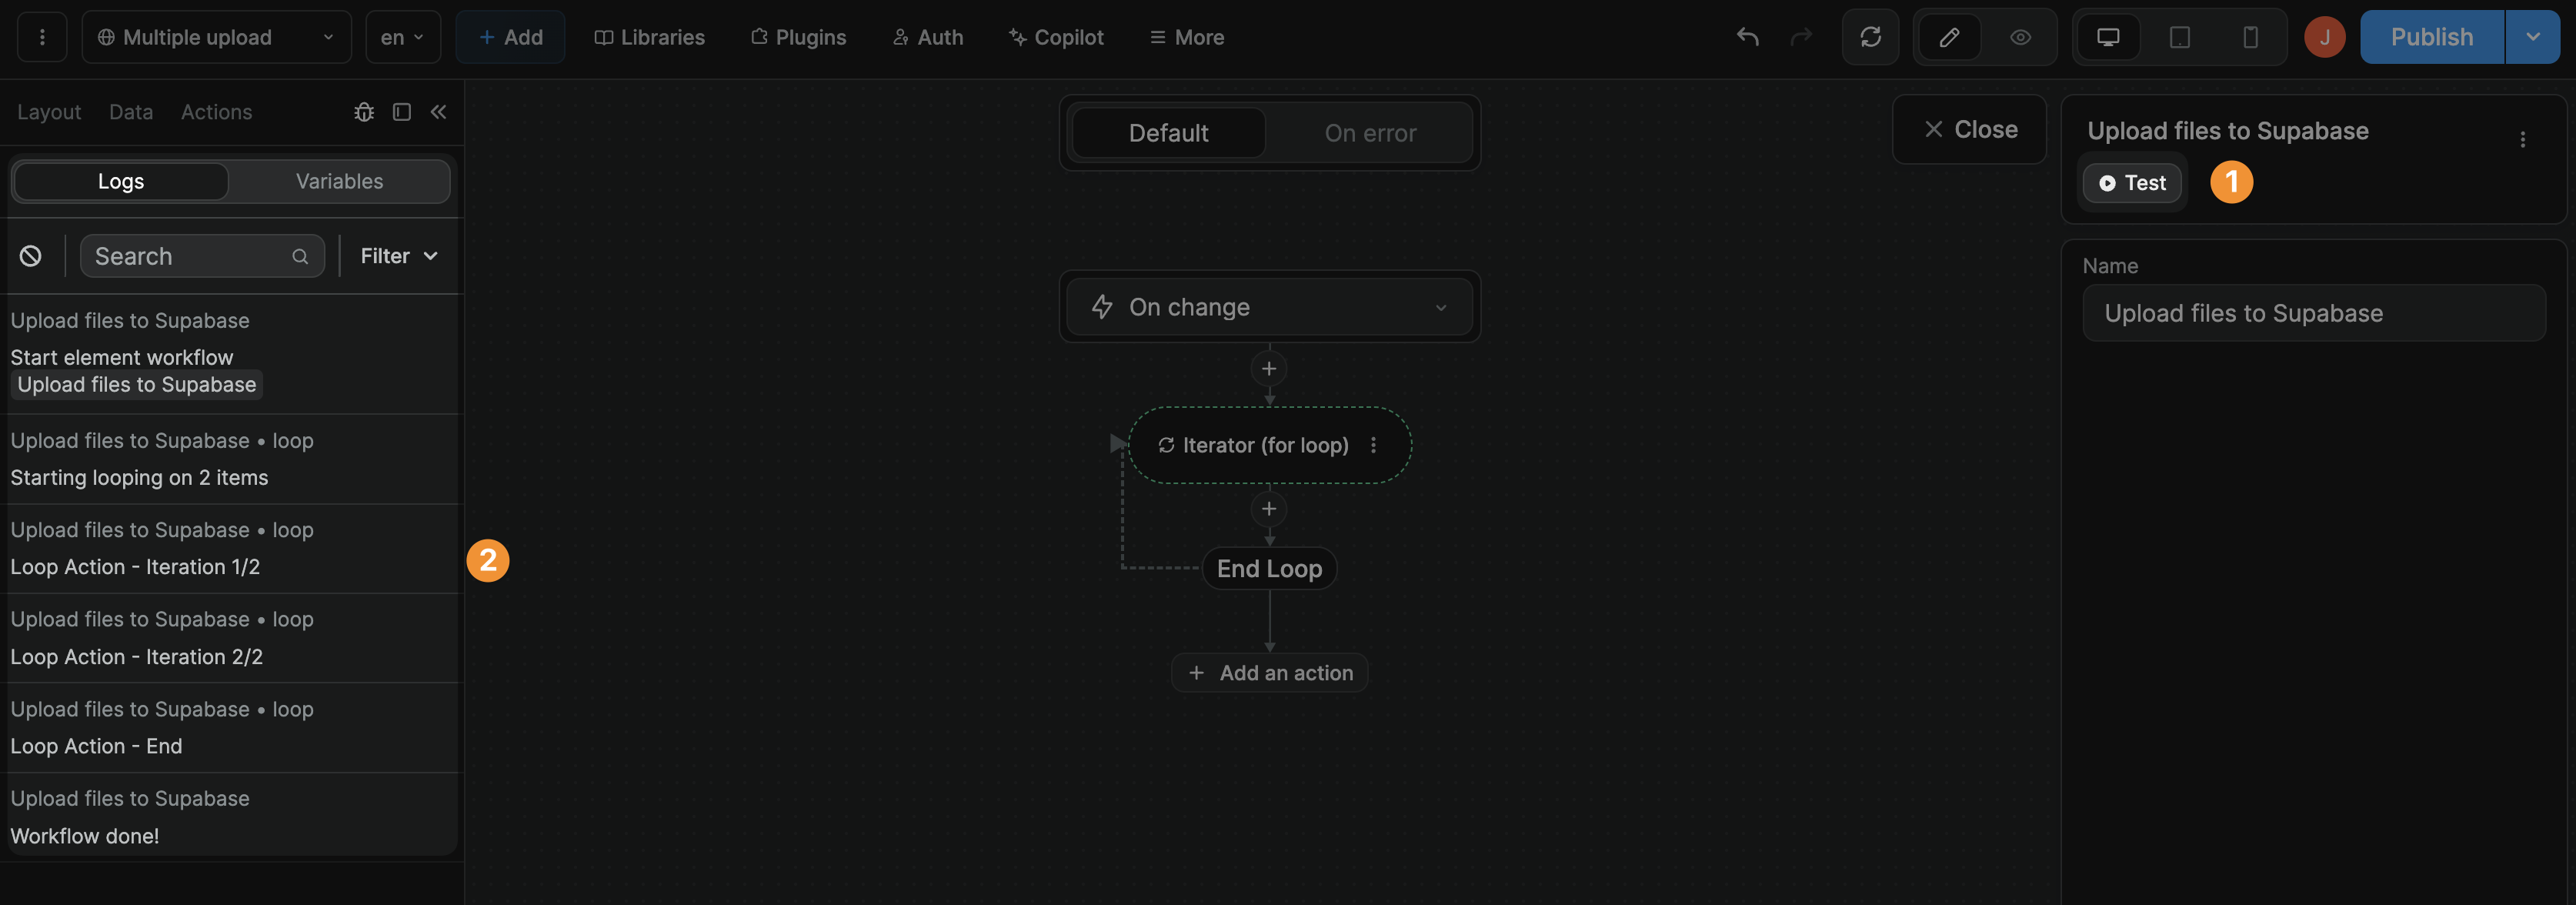
WARNING
This step is very important. If you skip it, it will be much harder for you to bind data in the next step.
Upload action
Once you have uploaded a couple of files in preview mode and tested your workflow, you can add a Supabase Storage | Upload a file action.
From bucket
This is where you will input the name of the Supabase bucket where the file should be stored. In our case, we called it your-bucket.
Path
This is the name of the uploaded file with its extension:
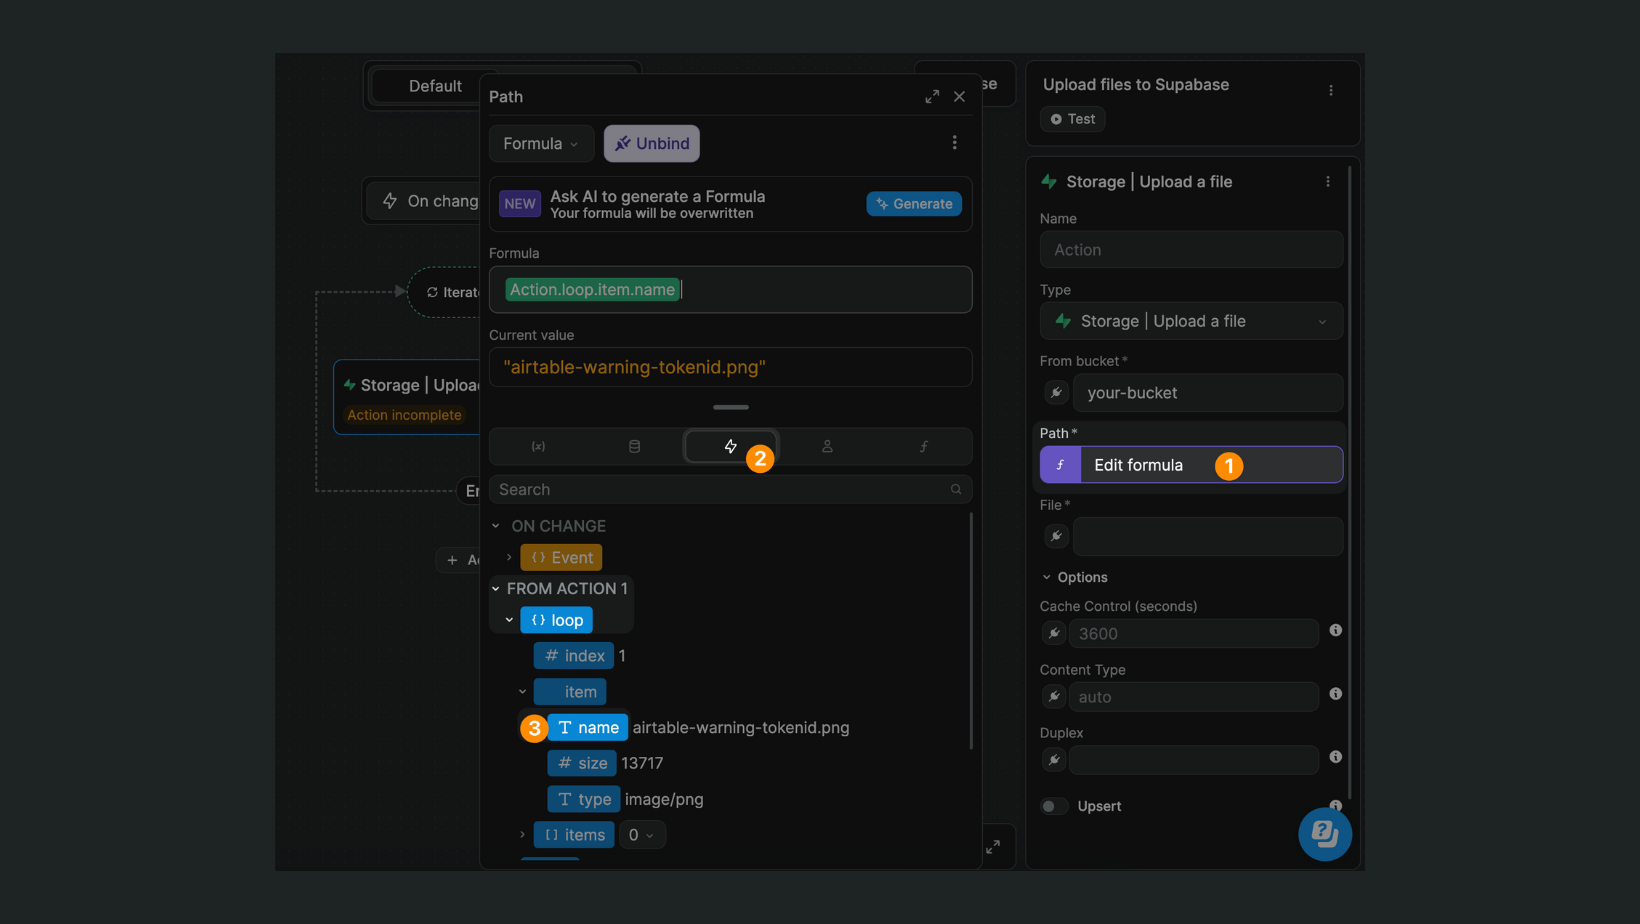
Here, because the user uploaded multiple files, we have to bind to the name inside the current item of the loop action of our workflow.
File
This is the file object itself (notice how the Current value is an object with a lot of information about the file that was uploaded):
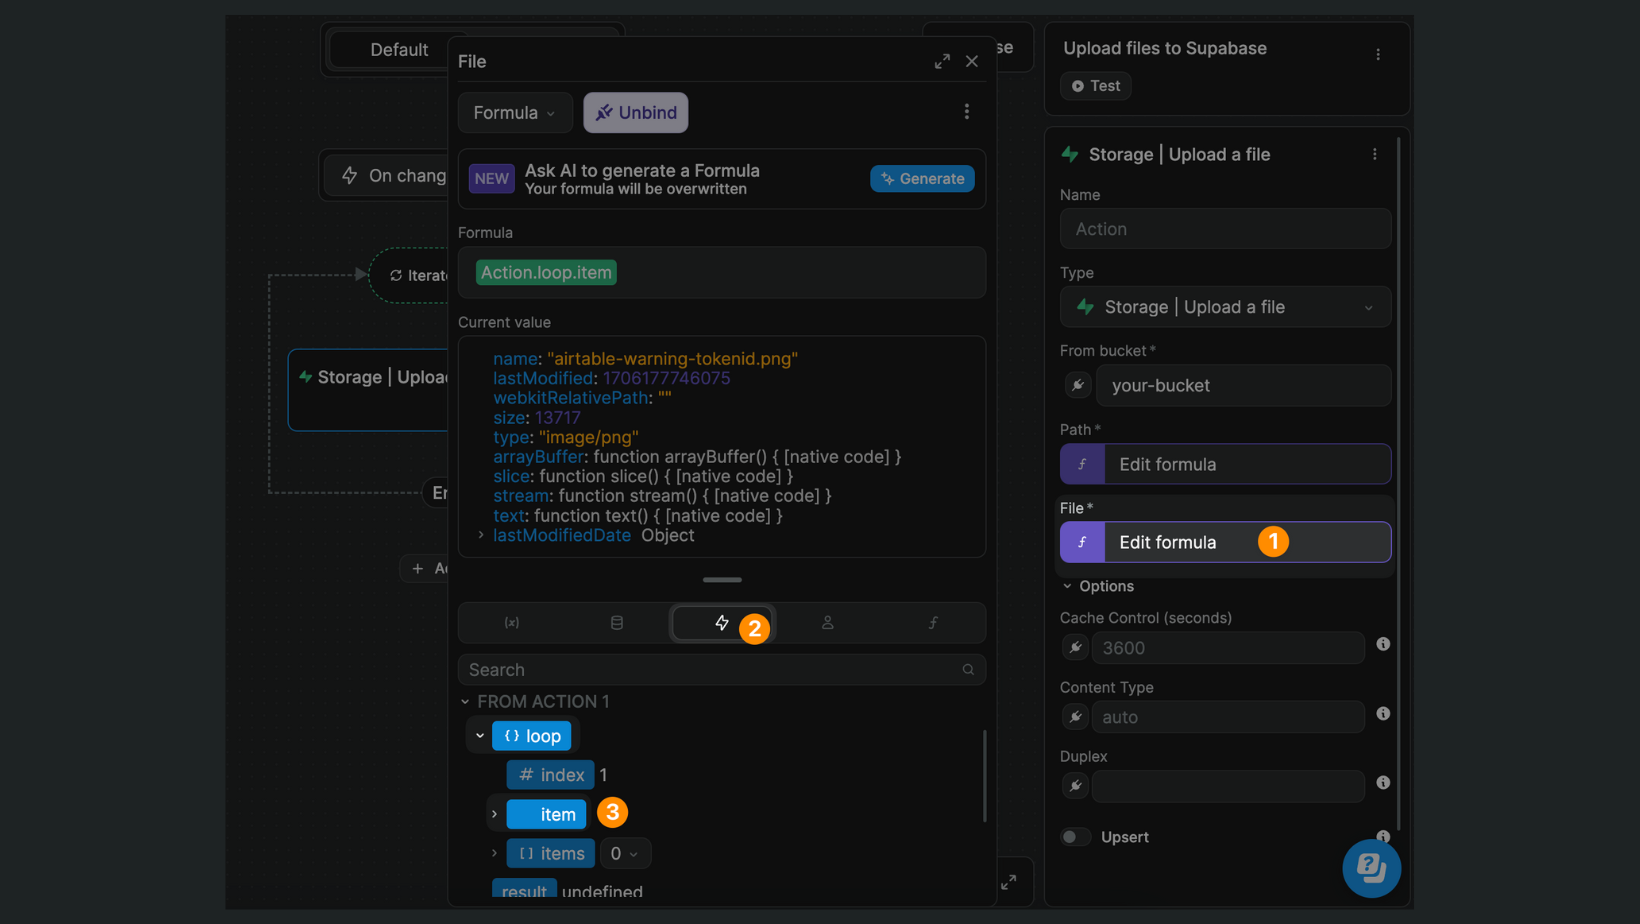
Here, because the user uploaded multiple files, we have to the current item of the loop action of our workflow.
That's it! If you test your workflow and go back to your Supabase bucket, you should see the file in storage.
If you run into errors, make sure to go back to our section on Supabase RLS policies above.